Feature Guide
OBS, without the alt-tab.
Native WebSocket control of your scenes from inside streamerOS — no plugins. The OBS Bridge auto-discovers a running OBS instance, loads your scenes into the cockpit, and cuts the program feed without you ever leaving your game.
Connected in three steps.
Discover → Load → Switch. No plugin chain to maintain — the OBS Bridge talks to OBS Studio over its built-in WebSocket server.
Step 1 · Auto-discover OBS
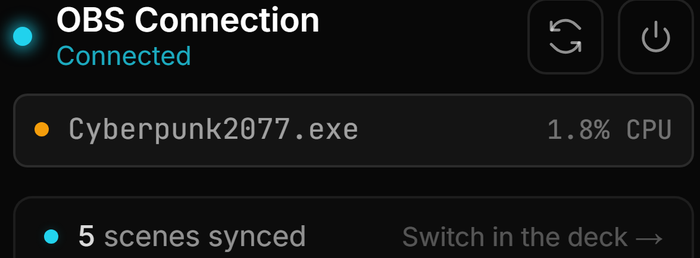
streamerOS finds your running OBS.
Launch OBS with its built-in WebSocket server on, and the OBS Bridge discovers it automatically over the network — no plugin to install into OBS. Prefer to be explicit? Enter the host by hand and connect manually.
Discover over WebSocket
Step 2 · Your scenes load in
Every OBS scene appears in the cockpit.
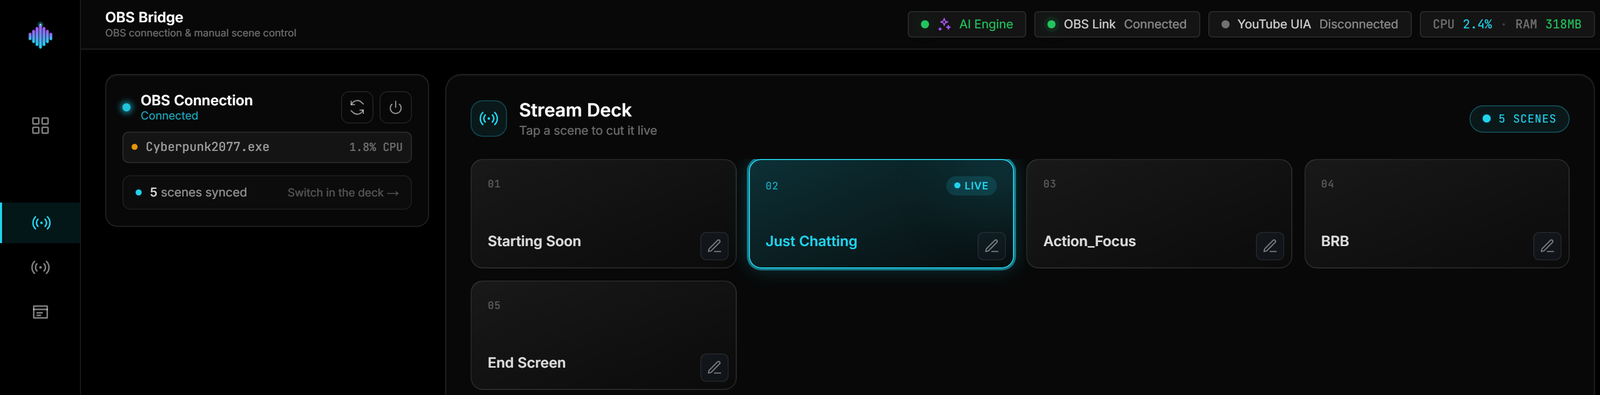
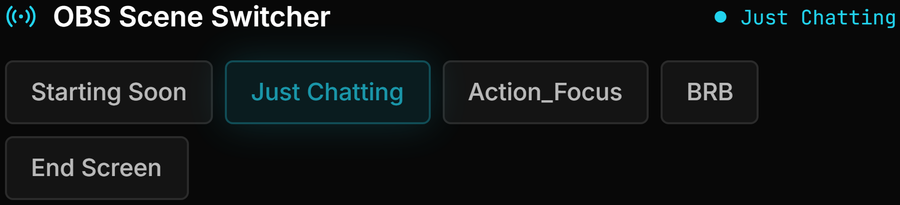
The moment the bridge connects, all of your OBS scenes stream into the cockpit's scene list. The current program scene is highlighted, so you always know what's live at a glance.
Scenes synced from OBS
Step 3 · Switch the feed from the cockpit
Click a scene to cut the program feed.
Click any scene and streamerOS switches the live program feed over the WebSocket — instantly, without alt-tabbing. The connection-status badge in the top bar stays live and reports the current program scene the whole time.
Cut the program feed
The foundation the Auto-Director builds on.
Reliable, plugin-free scene control is what makes automation possible. Once the OBS Bridge is live, the Auto-Director can switch your scenes for you — the bridge is the connection everything else rides on.
Frequently asked questions.
How does streamerOS connect to OBS Studio?
streamerOS auto-discovers your OBS instance over OBS WebSocket v5 — the official control interface built into OBS Studio — loads your scene list, and lets you switch the program feed from the cockpit. The connection runs entirely on your local machine; nothing routes through a server.
Do I need to install an OBS plugin?
No. The WebSocket server streamerOS talks to ships inside OBS Studio itself — you just enable it in OBS settings. There are no fragile third-party plugins to install, update, or debug.
Can I switch OBS scenes without alt-tabbing out of my game?
Yes. Your scenes appear in the streamerOS cockpit, so you can cut the program feed from there — or wire up the Auto-Hype Director and let streamerOS switch scenes automatically when chat reacts, with no manual input at all.
Does the OBS connection ever leave my machine?
No. streamerOS is zero-cloud by architecture: the OBS WebSocket link is a localhost connection between two apps on your PC. Your scene data and control commands never touch the internet.
More questions answered on the full FAQ.
The actual app
The bridge, end to end.
Connection, scene deck, and what it costs while your game is running.



Ships with v1.0 in February 2027.
The OBS Bridge ships in streamerOS v1.0 — native WebSocket control, no plugins to install into OBS, and a live status badge that never lies about what’s on air.
Launching February 2027